Showing posts with label home. Show all posts

Friday, August 10, 2012

Pinterest Project--Giant Multi-Picture Frame

 I love gallery walls. I have always wanted to hang one. The problem is I can't quite choose which pictures to frame and hang.  The Fam has SO many pictures...from SO many adventures and precious little moments...I can't pick just a handful.

Soooo, on my daily perusing of Pinterest (oh how I love you) images, I zeroed in on a larger than life frame with a grid of Instagram pictures, I knew I had my solution. No more despairing about having to leave out a great picture...I can put them all in there!


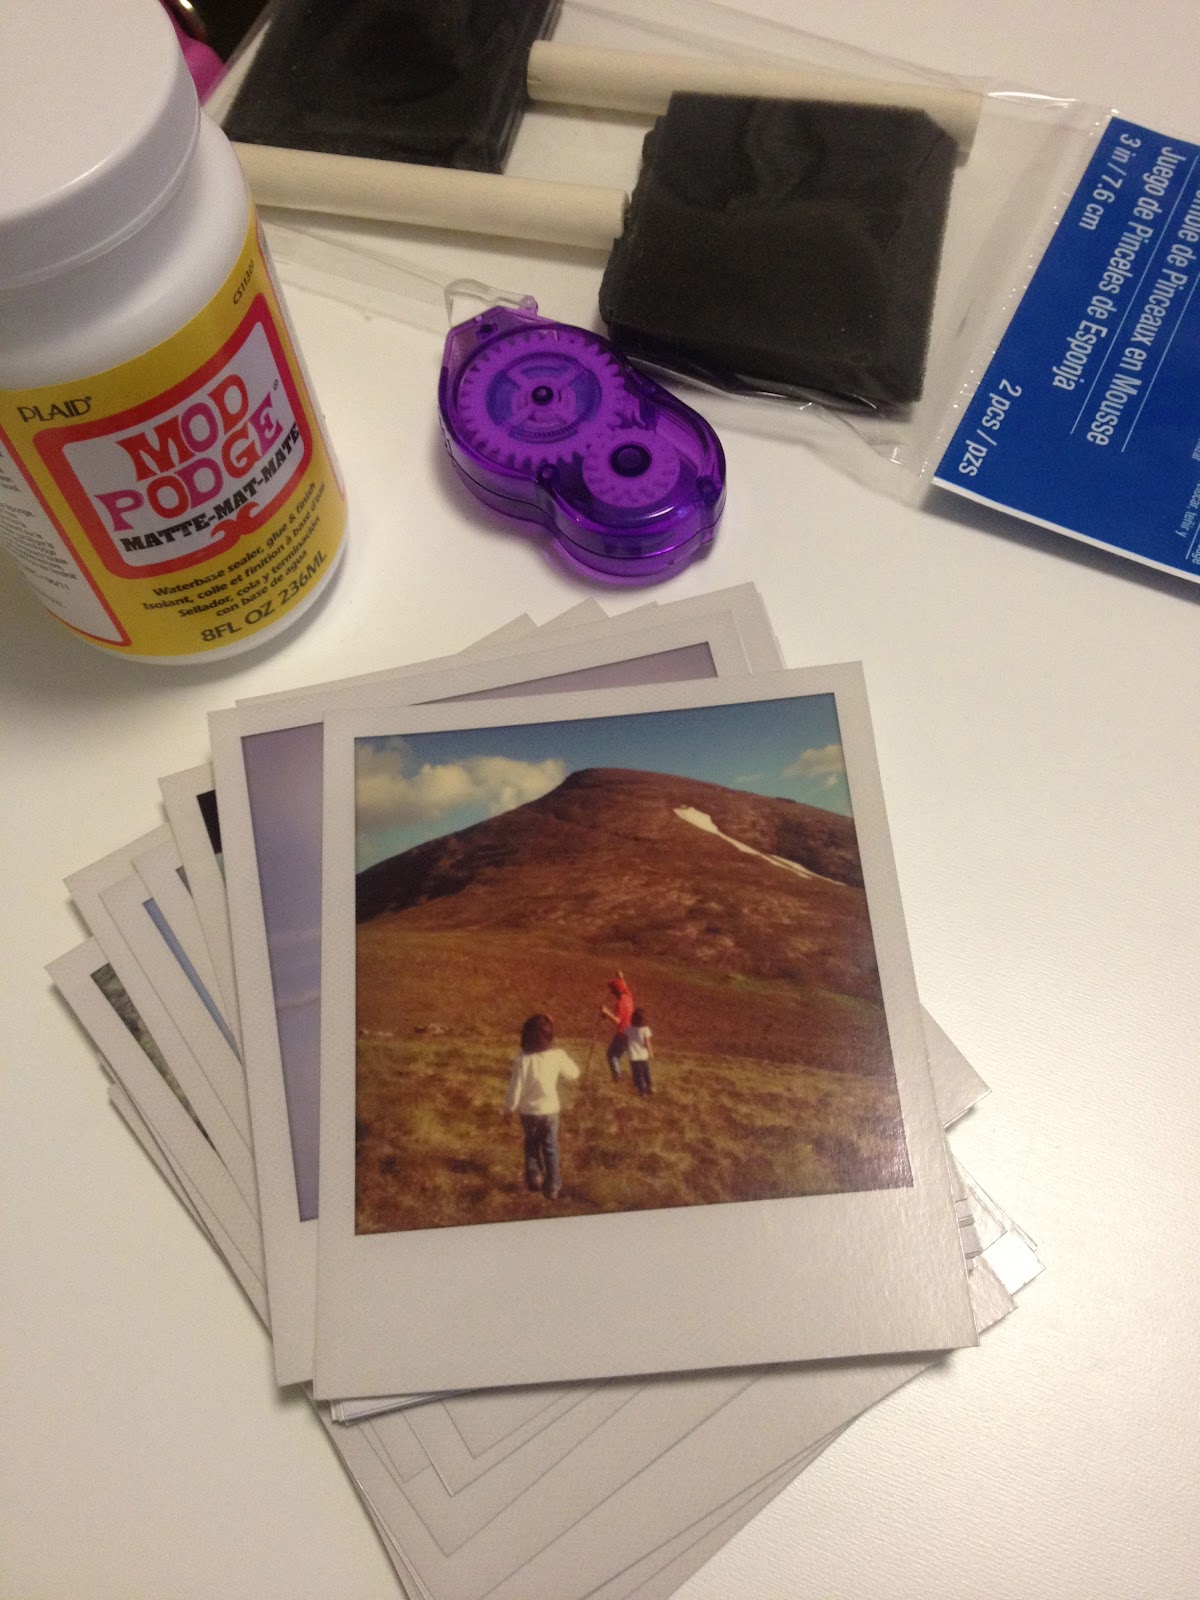
First, I narrowed down which pics I wanted in the frame.  Instead of Instagramming it and figuring out how to download onto my computer and then printing, I purchased a $5 desktop app called Instant.  Same premise as Instagram, with the various filters that can be applied to the images, it just applies a Polaroid-like layout to the finished picture.  I selected the 150 or so pictures (I told you I had a LOT, and picking those was difficult, too) I wanted on 4 x 6 photo paper and trimmed them to the Polaroid dimensions.

 I then put together four 20 x 30 foam core presentation boards ($2.99 ea at Michael's) with Masking Tape.

 Giving an allowance for the crown molding that will act as its frame, I laid out the images onto the board.

 I struggled with Mod Podging the images to the board as the paper kept curling and warping on me. I actually had to rip some pictures off and reprint them.  I finally settled on a very very very thin layer on the undersides of the pictures, waited for it to dry, and brush an even thinner layer on top.  Then I used a spray sealer to evenly coat the whole thing.

I had the hubby cut the crown molding to size and stapled the board to it from the underside.

A simple caulking job for the molding corners and voila! CHEAP as heck giant picture frame!

The whole thing sits on the floor, but is mounted to the wall at the top to keep it from toppling over rambunctious kiddos who like to play tag around the dinner table. It took me two days to complete, mainly because of my Mod Podge issues (printing out the pictures and trimming them took the longest). Not bad for a total of $23. I don't think I can find a frame that big for that much.

Oh, yeah and this project was done to ignore that to-do I've been ignoring forever....those too-short curtains! LOL

Tuesday, April 3, 2012

A Place for Everything...Suitcase Closet

 A suitcase closet? What??? Really, when you think about it, there ARE five members in this family and we DO travel quite a bit.

We have this small closet at the top of the stairs...lacking in shelves or even a simple hanging rod.  The Mister and I had originally planned on installing shelves in there, but since all the studs were in awkward places and we didn't really want to put wall anchors in yet again, we ended up nixing the idea.  Then we cleaned up the garage and we had one extra freestanding shelf with nowhere to put it.

Before this, our suitcases were jammed under the crawl space of the stairs.  We had to squeeze in there somehow and lug out the pieces we needed when a trip was in the books. Wouldn't it be nice to just open a door and see every piece of luggage you have and simply pull it out when you want it?

And the suitcase closet came to be!


Frankly, there's not much to explain here. The hubby's deployment bags are consolidated on the top shelf. Carry-ons, the girls' Trunki's and their backpack booster seats, full-size pieces, overnight bags, garment bag, even Roxy's carry-on pet carrier are all here...in plain view...easily accessible.

Whoever said there's not enough storage space in base housing?


Thursday, March 22, 2012

A Place for Everything...GARAGE!

This was a big weekend project Mister Och and I have been putting off for the entire year we've been in this house.  We've kinda sorta organized it when we moved in...but there was no specific system...and no motivation to keep it a particular way...so it turned out looking like this...

This is a ONE car garage people! (why ever would these dunces think families living in Alaska be OK with only one sheltered car with the other's battery being drained by the subzero temps outside is beyond me) But, just take note of all the junk sitting on the floor. We would have to climb over and around these articles going in and out of the car. 

And check this out...
There's this hallway/storage area/exit to the backyard space towards the back of the garage. Strange configuration, I know, but extra space is always welcome.  Yes, this is a queen mattress just sitting there from our previous home's guest bedroom (no space inside). There's also a pile of patio furniture cushions just thrown in front of that back door. Out of sight, but taking just as much space, are boxes of things we didn't have room for.

I've mentioned the mouse problem we had, right? Our unit butts up against a thick stand of trees, which provides a nice view from our windows, but apparently houses field mice as well. There was a ventilation shaft that wasn't properly screened that we believe was used as an entrance to the garage. When temps started to drop...the warmth of our heated garage beckoned to them like a siren song. The sight of mouse droppings up and down the walls was enough to get my ass in gear to clean all this up.

I didn't quite know how to go about organizing the space.  

And then this picture from the Container Store grabbed ahold of my heart and didn't let go:


Wall-mounted shelving! So pretty!!! Solution to keep things out of the reach of mice! YES!!!

Price tag for this system: $1180.00

Ouch! 

But I was so desperate to have this, I convinced myself it was worth it.  But every time the "checkout" button was to be pressed, I just couldn't spend that much dough. So I yammered on and on about it until the hubby gave in and took leave one Friday so we can explore other options. 
(Lowes and Home Depot, baby!)


Spending just a fraction of the Container Store sticker price we came up with this:


The Rubbermaid Fast Track system holds up golf pull carts, junior golf sets, and lawn chairs on one track. Underneath sits the recycling bin and the golf organization rack.  The lower track holds the kids' sleds and balls plus hula hoop (they can get their stuff themselves!).

The wall-mounted shelving is a heavy duty Closetmaid system available at Home Depot.

Let's take a closer look at the bins, shall we? Before we purchased everything, I made an inventory of the things we had and drew in a rough plan of where on the shelves they will be kept:

It's all pretty self-explanatory.  Grilling and gardening supplies are on the higher shelves since we only use them three months out of the whole year, if that. Auto coolant and wiper fluid are in another bin out of the kids' reach. I have a little silver bucket that holds my car cleaning kit next to it as well.  

The hiking bin is our grab-and-go bin, should we get an impulse to go out and enjoy a beautiful day.  It holds: two cans of bear spray, insect repellant spray and bracelets, water bottles, sunscreen, bear bells, and granola bars. Our hiking poles are already stowed away in the car, so we are all set to go explore a trail whenever the mood hits us.

The bottom shelf is for the girls. The current season's bin sits on top. The winter toy bin holds: snowball makers, igloo block molds, and a snowman kit. The summer toy bin holds: bubble solution and related accessories, sidewalk chalk, shovels, and pails.

We keep a tool tote/basket on top of the Mister's tool chest that holds frequently used tools like screwdrivers, hammer, and such so he can simply grab that when I nag him to put something up on the wall for me. :-)

And of course the lantern is out in an easy access spot in case of power outages.


Next to the wall system, another Rubbermaid Fast Track rail holds the kids' bikes (minus Liv's since we owe her a new one this summer). The big black bin holds all of our sleeping bags.


On the other side of the wall:


Everything is off the floor on a track as well.  The shop vac is mounted to the wall, easy to use when cleaning out the car. Weed trimmer, rakes, snow shovels, and leaf blower are all on the track as well. The only thing on the floor in the corner is the bin that holds 10 gallons of ice melt.


 We installed these closet shelves upside down to corral our mess of shoes that normally serve as the tripping hazard of the space.


And here we move on to the little hallway space:

The mattress thrown in the dumpster, and the freestanding shelf we had moved to the corner, we finally could walk through without wrestling with something. (Yes, that is a washer and dryer...base housing provides these, but forbids their removal from the unit if you don't want to use them...circa 1990...no thanks)  The lawnmower, snow thrower, and steam vac run along this wall. 


The top shelf holds the big bulky stuff like the miter saw, an extra car battery, portable heater fan, and our ever constant supply of Corona. LOL. The black bins hold a variety of stuff...one holds painting supplies, another holds misc home improvement/repair supplies, another has the circular saw.  The bottom two shelves has our emergency supplies.  72-hour kits both for shelter-in-place and evacuation purposes.  Thoroughly prepared, just not on a Doomsday Preppers crazy level.  The bins give me easy access to update supplies and rotate food.

Well, that was long-winded enough, wouldn't you say? Anyone want to share their garage organization projects?


 

Wednesday, March 14, 2012

A Place for Everything...Fridge

 Downgrading from a mighty side-by-side fridge to the military housing's version was tough for Fam Och...well, mainly for me. With high-energy children, and one of them a growing pre-teen, keeping a stocked fridge was a necessity.  There's not much to this, really, but I thought to share anyway since there were some ideas I've picked up from Pinterest and other various sources that have made the most use of this teeny space.


One of my favorite containers in this fridge are the Sistema slim-line pitchers by Martha Stewart. I use them for Kool-Aid juice (my kids are junkies when it comes to Kool-Aid). The thing is, each kid prefers their own favorite flavor.  The slim profiles let me fit in three of them (one is behind the water pitcher) so each child has a pitcher of their fave juice at all times.  Plus, if you take note of the top of those pitchers, the lid seals to the rest of the body, and the spout has a knob that seals it closed as well...no more spills!

Underneath the pitchers is another slim container that houses anything that is left in the fridge to defrost,  It doesn't take up much room, but the sides keep any juices that may seep out away from everything else on that shelf.

And those white bins from the Target dollar section make another appearance! I have two of them in there, one for a sandwich kit basket and another for the kids' snacks.


This sandwich kit is mainly for my lazy 13 year old who thinks it too much trouble to put all those things he pulled out to make a sandwich back in their proper places. Before, I would find the mustard thrown into the very back. This has deli meat, assorted cheese slices, and the standard mayo and mustard bottles.  


The snack bin has little containers of cut fruit in serving sizes, drinkable yogurt, fruit cups, and Babybell cheese rounds. The basket sits at a level that the girls can look right into when they open the fridge. This works the best for Miss Sophie when she comes home from school famished, she can simply grab two things from the bin and she's good to go for her snack.

And yes, you did see my onions, garlic, and potatoes in one of the bottom drawers. I know they keep best in a pantry..but we recently had a problem with mice breaking into the house...and ever since then, I have all of our food within the confines of the fridge, or in airtight containers in the pantry.

Although I would rather have my lovely old side-by-side, when organizing food in this current one, the trade-off in space isn't so bad anymore.


Monday, January 30, 2012

A Place for Everything...Entryway

I have issues. Let's just get that out there right now. I have issues with random objects laying around in random locations. The entirety of my household inventory has its own designated place (yes, even the toys, and specific toys in specific bins at that).  It's just the way I am. I find joy in knowing where everything is (and the term control freak comes up yet again!). Many have critiqued me, saying I spend so much time cleaning/organizing/planning that I am missing out on the simple things in life. Aheeem.  Well, it has also been said that ten minutes of organizing is an hour gained in the future.  Besides, the simple things are mornings in which I am not frantically running around the house in a quest to find Sophia's other glove so she doesn't miss the bus.

Anyway, I digress.  My lovely sister, Miss Smitten (check out her blog, HERE, it's fabulous!), has requested I share some of my organization projects since the area is not her forte.  I am the stickler for order, and she is the creative free spirit.  So, in the effort to appease the spoiled brat (j/k, you know I love you...well, sometimes..), here goes:

Up here in AK, houses require an arctic entry...a foyer of sorts, where one could enter through the front door, shed outerwear and snowy boots, and pass through yet another door to the interior of the home. It serves as a buffer from the ridiculous cold and keeps interior plumbing from freezing and exploding. Fam Och's particular arctic entryway is a mere 5' x 6' box of a space.  But with the help of Ikea and Target, I've turned it into an orderly little area.


We don't have an Ikea here in Alaska. The closest one is in Washington state, and the majority of their goods are unavailable for shipping (meanies). But in the extensive research I performed after PCS notification, I was able to plan ahead and purchase the items I thought would fit in this cozy little base housing unit.

1) Tjusig in white.  Double duty as a coat rack, and storage platform on top. We also purchased another rack just like it minus the hat platform for the little ones' coats.

2) Stave mirror in white. Simple and clean and lovely. Perfect for last minute touchups. 

3) Stall shoe cabinet in white. This is the official dumping ground for my girls' shoes.  Really, it can only fit 8 pairs of adult shoes.  But so so much more itty bitty ones. One side is Liv's, the other Sophie's.

4) Canvas bins. The pair fit perfectly atop the coat rack. These store extra hats, gloves, scarves. 

5) Tsujig bench with shoe storage in white.  No need for hopping around on one foot trying to pull a shoe on.  Where the bigger shoes go.

6) Bright Vines Rug from Target.  Just a splash of color to liven up the area.  The gray hides dirt well...big plus!

7) Itso 3-compartment storage tray from Target.  For those in the fam with keys: Mister, Dylan, and yours truly have our own separate tray to toss keys, wallet, sunglasses, and other misc. stuff in. Fits perfectly atop the shoe cabinet.

8) A little Ikea one, to remind those who are super slow to get a move on it lest they miss their transportation to school!

9) Boot tray.  This is an essential piece as snow and ice stuck to our boots tend to leave a big muddy puddle on the floor. Conveniently, ours sits facing the vent which helps the boots dry more quickly.


Our Entryway:


Note that the children's coat rack is hung at their level. They can put their coats on and put them away all by themselves. Sophie's backpack belongs there as well.

So there you have it.